
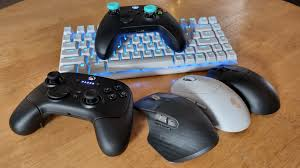
Introduction
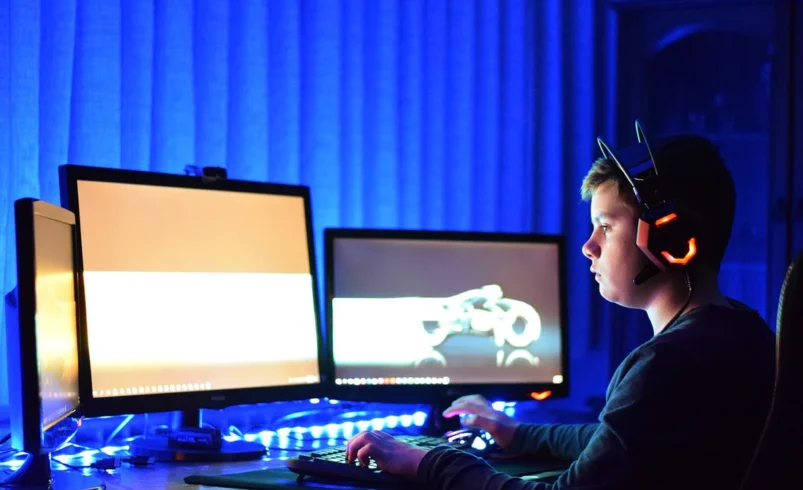
If you’ve ever been deep into an intense gaming session only for your mouse to stop responding, your keyboard lights to freeze, or your controller to disconnect, you know how frustrating peripheral issues can be. Gaming peripherals — the devices that connect you to your virtual world — are the heartbeat of your setup. They include gaming mice, keyboards, headsets, controllers, webcams, and even racing wheels. When one of these fails, it can completely disrupt your gameplay experience.
In this comprehensive guide, you’ll learn exactly how to troubleshoot gaming peripherals efficiently — whether it’s a hardware fault, software glitch, or driver conflict. We’ll go step by step through diagnosing problems, fixing connection issues, updating drivers, and optimizing performance so you can get back to gaming fast.
Why Do Gaming Peripherals Malfunction?
Gaming peripherals are sophisticated pieces of hardware built for speed, responsiveness, and customization. However, this complexity also makes them vulnerable to multiple points of failure. The most common causes include:
- Hardware wear and tear: Cables, switches, or sensors degrade over time, especially with heavy gaming use.
- Driver conflicts: Outdated or incompatible drivers can cause your peripherals to behave erratically or not be detected at all.
- Firmware bugs: Manufacturers release firmware updates to fix hidden bugs that impact performance.
- Power or connectivity issues: Faulty USB ports, weak wireless signals, or Bluetooth interference can disrupt communication.
- Software conflicts: Overlays, macros, or background apps may interfere with device operation.
According to a 2024 Statista report, nearly 38% of PC gamers reported experiencing at least one type of peripheral malfunction within six months — proving how widespread the issue is.
The Importance of Troubleshooting Your Own Devices
Knowing how to troubleshoot gaming peripherals is an essential skill for any gamer. Instead of relying solely on repair shops or warranty replacements, a few smart steps can often solve most problems in minutes. This not only saves money but also builds confidence in managing your gaming setup.
Troubleshooting also helps you understand your equipment’s behavior better. Once you learn to diagnose issues — whether it’s updating a driver, resetting a device, or cleaning an optical sensor — you can prevent small glitches from becoming major hardware failures.
What You’ll Learn in This Guide
This guide will cover everything you need to identify, diagnose, and fix gaming peripheral issues. By the end, you’ll know how to:
- Detect and isolate hardware or software-related problems.
- Update or reinstall device drivers and firmware.
- Resolve wireless connectivity and lag issues.
- Troubleshoot specific peripherals like gaming mice, keyboards, controllers, and headsets.
- Prevent future problems with smart maintenance habits.
Quote to Remember:
“Gamers who understand their gear spend more time playing — and less time fixing.”
So, whether your Razer mouse has stopped clicking or your Xbox controller refuses to connect, this guide will help you take control. Let’s dive into the process and learn how to bring your peripherals back to life.
Understanding Common Gaming Peripheral Problems
Before diving into how to troubleshoot gaming peripherals, it’s important to understand the most common issues that cause gaming accessories to fail or misbehave. Recognizing these early can save hours of frustration and help pinpoint where the problem lies — whether it’s hardware, software, or connectivity-related.
1. Hardware-Related Problems
Hardware problems are often the easiest to identify — and sometimes the hardest to fix. These involve physical damage or component failure inside the device.
Here are some of the most common signs and causes:
| Problem | Possible Cause | Quick Fix |
|---|---|---|
| Mouse not clicking or tracking | Dust in sensor or worn-out switch | Clean sensor with soft cloth or replace switch |
| Keyboard keys not responding | Faulty key switches or water damage | Test individual keys, replace switches if possible |
| Controller buttons sticking | Dirt buildup or mechanical wear | Clean with isopropyl alcohol and cotton swab |
| Headset not producing sound | Broken cable or damaged drivers | Try a different port or check driver settings |
💡 Pro Tip: If your device is under warranty, don’t attempt to open it before checking the manufacturer’s repair policy. Opening the case can void coverage.
2. Software or Driver Issues
Many gamers assume their device is broken when it’s really a software conflict. Gaming peripherals rely on drivers — small software programs that tell your PC how to communicate with your hardware.
Common symptoms of software or driver issues include:
- Device not recognized by your PC
- Lighting or macro settings not saving
- Random disconnects during gameplay
- Lag or delayed input response
To address these:
- Always keep drivers up to date through official software (like Logitech G HUB or Razer Synapse).
- Avoid third-party driver installers, as they can install outdated or malicious files.
- If your device recently stopped working after an update, roll back the driver to the previous version.
Fact: According to NVIDIA’s 2024 hardware performance report, nearly 45% of gaming peripheral malfunctions are caused by outdated or conflicting drivers rather than hardware failure.
3. Connectivity and Power Problems
Wireless peripherals like headsets and controllers often face connection drops or latency spikes. Even wired devices can malfunction if ports or cables are faulty.
Here’s what typically causes connectivity problems:
- Loose or damaged USB cables
- Weak Bluetooth or Wi-Fi signal
- Interference from nearby devices (e.g., routers, phones)
- Insufficient power from USB hubs or extension cables
Troubleshooting checklist:
✅ Plug directly into your PC (avoid hubs).
✅ Try a different USB port or cable.
✅ Re-pair wireless devices and reset Bluetooth adapters.
✅ Replace batteries or recharge built-in cells.
4. Firmware Glitches
Modern gaming peripherals include firmware — internal software that controls how the device behaves. If your mouse, keyboard, or controller is acting unpredictably, outdated firmware might be to blame.
Firmware bugs can cause:
- RGB lights freezing
- Device not saving profiles
- Buttons remapping automatically
- Device not detected after restart
Always install firmware updates from official brand websites. They often include bug fixes, performance improvements, and compatibility updates with new operating systems.
5. User-Configuration Errors
Sometimes, the problem isn’t hardware or software — it’s custom settings gone wrong. Over-customization through macros, lighting profiles, or third-party utilities can cause instability.
For instance:
- Setting high DPI values can make mice jittery.
- Incorrect key bindings may prevent response in games.
- Conflicting programs (like Discord overlays or FPS counters) can block device access.
🧩 Solution: Reset devices to factory settings when in doubt. It’s a simple but often overlooked step that can instantly resolve strange behavior.
Understanding these common issues gives you a solid foundation before learning the step-by-step process of how to troubleshoot gaming peripherals effectively.
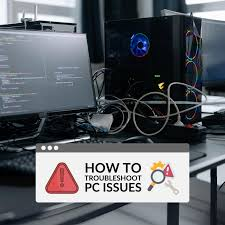
Step-by-Step Guide: How to Troubleshoot Gaming Peripherals
When your gaming gear suddenly stops working, don’t panic. Most issues can be resolved with a systematic approach. Below is a detailed step-by-step troubleshooting guide to help you diagnose and fix problems with your mouse, keyboard, headset, or controller quickly and safely.
Step 1: Identify Which Peripheral Is Causing the Problem
Before taking any action, figure out which device is misbehaving. Ask yourself:
- Is it a single device (e.g., just the mouse)?
- Or are multiple peripherals acting up (e.g., mouse and keyboard together)?
If more than one device is malfunctioning, the issue could be with your PC’s USB controller, power supply, or software conflicts — not the peripherals themselves.
✅ Quick Test:
Try each device on another computer or laptop. If it works there, your PC setup is likely the problem. If not, the peripheral itself is at fault.
Step 2: Check Physical Connections and Power Supply
Loose or faulty connections are the number one reason peripherals fail.
Do this:
- Unplug the device and inspect the USB cable for fraying or bends.
- Plug it into a different port directly on your PC (avoid front-panel or hub connections).
- For wireless peripherals:
- Ensure the device is charged.
- Replace batteries or connect the charging cable.
- Re-pair the Bluetooth or wireless dongle.
💡 Tip: Always connect high-performance peripherals like RGB keyboards or gaming mice directly to the motherboard USB port — they often require more stable power.
Step 3: Inspect Device Manager and Driver Status
Once you’ve verified the hardware, the next step is checking whether Windows (or macOS) recognizes your device.
Windows users:
- Press Win + X → Device Manager.
- Expand the “Human Interface Devices” or “Universal Serial Bus Controllers” sections.
- Look for yellow exclamation marks ⚠️ — these indicate driver conflicts or missing software.
If found:
- Right-click → Update driver.
- Choose “Search automatically for updated driver software.”
If that fails, visit the manufacturer’s website (e.g., Razer, Logitech, Corsair) and download the latest official driver.
🧠 Fact: Over 60% of gaming peripheral issues are resolved simply by updating or reinstalling the correct driver.
Step 4: Reinstall or Update Firmware
If your device lights up but doesn’t respond properly, it may need a firmware refresh.
Steps:
- Open the brand’s configuration app (e.g., Razer Synapse, Logitech G HUB, SteelSeries GG).
- Look for a “Device Firmware Update” or “Repair Device” option.
- Follow on-screen instructions — do not unplug your device during this process.
Firmware updates fix bugs, improve compatibility, and optimize response time. Some manufacturers even release firmware updates to enhance polling rates or RGB synchronization.
Step 5: Test on Another System or USB Port
If your peripheral still misbehaves, test it on another computer.
This step is crucial for narrowing down the issue:
- If it works elsewhere → your original system’s drivers or power settings are likely the issue.
- If it doesn’t → the device hardware is defective.
You can also test using different USB standards:
- USB 2.0 ports are more stable for older peripherals.
- USB 3.0 or higher is better for power-demanding RGB setups.
Step 6: Reset and Reconfigure the Device
Most modern gaming peripherals allow factory resets via button combinations or software options.
For example:
- Razer Mouse: Hold left + right click + scroll click for 7 seconds.
- Logitech Keyboard: Hold Esc for 5 seconds while plugging in the device.
- PlayStation Controller: Press the small reset button near the back for 3 seconds.
After resetting, open your gaming software (e.g., Razer Synapse or iCUE) and reapply your custom settings, macros, or lighting profiles.
Step 7: Scan for Software Conflicts
Sometimes third-party programs block or override your peripherals. Common culprits include:
- Game overlays (Discord, Steam, or NVIDIA GeForce Experience)
- Background apps like MSI Afterburner or RGB Sync utilities
- Antivirus software that restricts USB input
Fix:
Temporarily disable or close these apps one by one to see if the problem disappears. If it does, adjust permissions or update the interfering app.
Step 8: Optimize System Power Settings
Windows sometimes disables USB ports to save energy — especially on laptops.
To fix this:
- Go to Control Panel → Power Options → Change Plan Settings → Advanced Settings.
- Under “USB Settings,” set “USB selective suspend” to Disabled.
- Restart your PC.
This ensures your gaming peripherals stay powered even when the system goes idle.
Step 9: Contact Support or Use Warranty Options
If none of the above works, contact the manufacturer’s support. Provide them with:
- Device model and serial number
- Proof of purchase
- Description of the issue and steps you’ve already tried
Brands like Logitech, Corsair, and SteelSeries have excellent RMA programs that replace devices quickly under warranty.
By following this structured process, you’ll be able to fix 90% of common peripheral problems — without needing a repair technician.
Troubleshooting Specific Gaming Devices
Every gaming peripheral has its own unique set of problems and solutions. In this section, you’ll learn how to troubleshoot gaming peripherals by type — from mice to headsets — using targeted methods that address the most frequent real-world issues.
🖱️ Troubleshooting Gaming Mice
A malfunctioning mouse can ruin your aim or responsiveness in fast-paced games. Whether you use a wired or wireless mouse, follow these checks:
Common Problems:
- Cursor freezing or skipping
- Random disconnects
- Mouse buttons not working
- DPI settings not changing
- Mouse lag during gameplay
Solutions:
- Clean the optical sensor — Dust or hair under the sensor causes erratic movement. Use a microfiber cloth or compressed air.
- Check the surface — Reflective or glossy mousepads can interfere with tracking. Use a textured pad.
- Reinstall drivers — Go to Device Manager → Mice → Right-click your device → Update driver.
- Reset DPI software — In Razer Synapse or Logitech G HUB, restore DPI and sensitivity to default.
- Firmware update — If lights flicker or macros stop working, update via your brand’s app.
💡 Pro tip: Avoid using multiple mouse configuration programs (like both Razer Synapse and iCUE). They may conflict and cause detection errors.
⌨️ Troubleshooting Gaming Keyboards
Gaming keyboards are designed for speed and durability, but problems like ghosting, unresponsive keys, or lighting issues are still common.
Common Problems:
- Keys not registering
- RGB lights not working
- Sticky or double-clicking keys
- Input delay or ghosting
Solutions:
- Physical cleaning: Turn the keyboard upside down and gently shake out debris. Use compressed air between keys.
- Test key response: Use an online keyboard tester (like keyboardtester.com).
- Update firmware and software: Logitech G HUB, Razer Synapse, or Corsair iCUE often release bug fixes for lighting and macros.
- Disable game overlays: Discord or Steam overlays sometimes block key inputs.
- Factory reset: Most gaming keyboards have a reset shortcut (e.g., hold Fn + Esc for 5 seconds).
🧠 Stat: According to a 2024 gaming hardware survey, 27% of players reported keyboard malfunction within two years of purchase — usually due to dust or liquid damage.
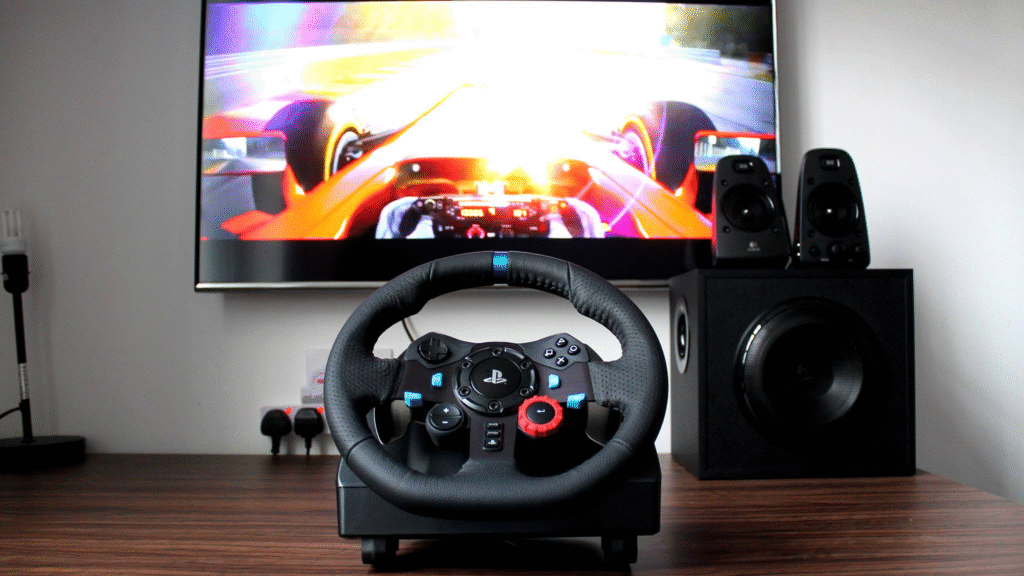
🎮 Troubleshooting Controllers (PC, Xbox, PlayStation)
Modern controllers are feature-rich but prone to connection problems, drifting analog sticks, and button lag.
Common Problems:
- Controller not connecting via USB or Bluetooth
- Input lag or drift
- Buttons sticking
- Controller randomly disconnecting
Solutions:
- Re-pair the controller: Remove old pairings in your system settings, then reconnect.
- Wired test: Plug directly via USB cable to rule out Bluetooth issues.
- Calibrate analog sticks: In Windows, go to Control Panel → Devices → Game Controller Settings → Calibrate.
- Reset firmware: For Xbox or PlayStation controllers, update or reset firmware via their console settings or PC utility.
- Fix drift: Spray compressed air around the joystick base; if it persists, it may require sensor replacement.
🎯 Case Study: The Nintendo Switch Joy-Con drift issue became so widespread that Nintendo extended free repairs globally — showing how common analog drift can be across brands.
🎧 Troubleshooting Gaming Headsets
A great gaming headset is vital for immersive sound and communication. But when sound cuts out or the mic stops working, quick troubleshooting can restore clarity.
Common Problems:
- No sound or one ear not working
- Microphone not detecting voice
- Sound distortion or echo
- RGB lights not turning on
Solutions:
- Check default device settings:
- Right-click the sound icon → Sounds → Playback tab → Set your headset as Default Device.
- Mic permissions:
- Go to Settings → Privacy → Microphone → Allow access for apps and games.
- Cable or adapter issues:
- Replace detachable 3.5mm cables or USB adapters if they feel loose or damaged.
- Update sound drivers:
- Visit Realtek, Logitech, or SteelSeries websites for driver updates.
- Firmware update:
- Use official software to ensure compatibility after system updates.
💬 Tip: Avoid plugging your headset into both front and rear audio jacks — this can confuse your system’s sound routing and cause distortion.
Bonus: Troubleshooting RGB Sync and Macro Issues
Many gamers love synchronized RGB lighting and custom macros — but these features often break due to software conflicts.
Fixes:
- Run only one RGB software at a time (e.g., Razer Synapse or iCUE).
- Reinstall macro configuration apps and ensure profiles are saved locally.
- Disable Windows fast startup — it can sometimes prevent lighting profiles from loading properly.
By mastering these device-specific fixes, you can save hours of frustration and keep your gaming setup in top shape — all without expensive repairs or support delays.
Preventive Maintenance Tips for Gaming Peripherals
Knowing how to troubleshoot gaming peripherals is essential — but the best strategy is to prevent problems before they start.
With a few simple maintenance habits, you can extend the lifespan of your gaming gear, improve performance, and avoid costly repairs.
1. Keep Your Gear Clean and Dust-Free
Dust, crumbs, and oils from your hands are silent killers for gaming devices. Over time, they cause sticky buttons, poor sensor tracking, and overheating.
Maintenance Checklist:
- Use compressed air or a soft brush to remove debris weekly.
- Wipe down surfaces with isopropyl alcohol (70%) and a microfiber cloth.
- Avoid eating or drinking near your setup.
- Clean mousepads regularly — dirt buildup affects sensor accuracy.
💡 Pro Tip: Invest in a keyboard cover or dust guard if you don’t game daily. It keeps switches clean and responsive.
2. Manage Cables and Connections Properly
Poor cable management isn’t just untidy — it leads to bent USB connectors and broken insulation.
Cable Care Tips:
- Avoid tight bends and tension on wires.
- Use Velcro straps or cable sleeves to organize cables.
- Never yank a plug — always remove it gently by the connector.
- For wireless peripherals, store USB dongles safely when not in use.
🎯 Fact: Over 30% of mouse and keyboard failures are due to cable strain or damage, not internal defects.
3. Regularly Update Drivers and Firmware
Updates aren’t just about new features — they fix bugs, improve compatibility, and boost performance.
Best Practices:
- Check for driver or firmware updates once a month.
- Only use official brand software (e.g., Logitech G HUB, Corsair iCUE, Razer Synapse).
- Enable notifications for firmware updates if available.
🧠 Tip: Outdated firmware can cause lag or miscommunication between peripherals and your operating system — especially after Windows updates.
4. Store Peripherals Safely
If you’re not using your gaming peripherals daily, store them properly to protect from moisture, dust, and heat.
Safe Storage Guidelines:
- Keep devices in a cool, dry place.
- Avoid direct sunlight (especially for plastic-bodied gear).
- For controllers, remove batteries if storing long-term to prevent corrosion.
- Use hard-shell cases for travel to protect from impact damage.
5. Use Surge Protectors or UPS
Electrical surges can instantly fry delicate circuits in gaming devices — even during a brief power fluctuation.
Protection Essentials:
- Always connect your PC and peripherals through a surge protector or uninterruptible power supply (UPS).
- Avoid plugging multiple high-wattage devices into the same socket.
- If you live in an area with unstable electricity, invest in voltage regulators.
⚡ Case Example: A 2023 Reddit gaming community survey found that 1 in 10 gamers lost at least one peripheral due to a power surge — mostly from lightning or faulty sockets.
6. Limit Over-Customization
Custom macros, lighting effects, and polling-rate tweaks are fun — but overdoing them can cause instability or software conflicts.
Balance Tip:
Stick to essential configurations and keep your settings backed up. Use cloud profiles where available (like Logitech G HUB or SteelSeries GG) so you can easily restore defaults.
7. Schedule Regular System Health Checks
Many gaming peripheral problems start from PC-level issues — not the devices themselves.
Monthly Check Routine:
- Run Windows Update for OS stability.
- Scan for malware or registry errors.
- Clear cache and temporary files.
- Check USB power settings (disable selective suspend).
Maintaining your operating system helps ensure smooth communication between peripherals and drivers.
8. Handle with Care During Setup and Transport
When setting up or moving your gaming station, handle peripherals carefully to prevent static shock or drop damage.
Safe Handling Practices:
- Always discharge static electricity before plugging in a device.
- Avoid pulling devices by their cords.
- Use padded bags or boxes when traveling with peripherals.
With consistent care and mindful use, your gaming peripherals can last years longer, delivering top-tier performance without frequent troubleshooting.
Advanced Troubleshooting Techniques for Gaming Peripherals
Sometimes, even after all the usual fixes, your gaming peripherals might still act up — lagging, disconnecting, or behaving erratically.
That’s when advanced troubleshooting comes into play. These methods require a bit more technical knowledge but can often pinpoint and solve problems that simple fixes miss.
1. Use Device Manager and Event Viewer
Windows’ built-in tools are powerful if you know how to use them.
Device Manager
- Press Windows + X → Device Manager
- Expand Keyboards, Mice, or Human Interface Devices
- Right-click the problematic device → Properties → Events or Driver tab
- Check for yellow exclamation marks (⚠️) or driver errors
If you see Code 43, Code 10, or “Device not recognized,” uninstall the driver and scan for hardware changes to reinstall it.
Event Viewer
- Press Windows + R → eventvwr.msc
- Go to Windows Logs → System
- Filter by Error or Warning events
- Look for timestamps matching the issue — such as “USB device reset” or “driver timeout.”
🧠 Pro Insight:
Event Viewer logs often reveal exactly which process or driver caused the failure — saving hours of guessing.
2. Diagnose USB Power and Bandwidth Issues
Many gaming peripherals — especially RGB keyboards, external DACs, or racing wheels — draw heavy power through USB ports. If your ports are overloaded, devices might disconnect randomly.
Steps to Check USB Power:
- Open Device Manager → Universal Serial Bus Controllers
- Right-click a USB Root Hub → Properties → Power tab
- Review “Power required” vs “Available.”
- If multiple devices exceed available power, move some to another hub or powered USB extender.
💡 Tip:
Use powered USB hubs for high-demand gear like VR headsets or RGB controllers to prevent brownouts and lags.
3. Perform a Clean Boot to Eliminate Conflicts
Sometimes, background apps interfere with peripheral drivers — especially RGB control software from different brands.
How to Perform a Clean Boot:
- Press Windows + R → msconfig → Services tab
- Check “Hide all Microsoft services”
- Click “Disable all” for non-Microsoft entries
- Restart your PC
If your peripherals work fine afterward, re-enable services one by one to identify the conflicting software.
Common culprits include Razer Synapse, Corsair iCUE, or SteelSeries Engine when used together.
4. Reinstall USB Controller Drivers
If multiple peripherals misbehave, your USB controller may be corrupted.
To fix it:
- Open Device Manager → Universal Serial Bus Controllers
- Right-click each controller → Uninstall device
- Restart your PC
Windows will automatically reinstall fresh USB drivers.
⚙️ Fact: Reinstalling USB controllers resolves about 70% of unrecognized device errors in gaming setups, according to Microsoft Support data.
5. Update BIOS and Chipset Drivers
Your motherboard controls how USB ports, Bluetooth, and PCI devices communicate. Outdated BIOS or chipset firmware can cause input lag, ghosting, or disconnects.
Steps:
- Visit your motherboard manufacturer’s site (ASUS, MSI, Gigabyte, etc.)
- Download the latest BIOS and chipset drivers
- Follow official update instructions carefully
🧠 Warning: BIOS updates carry risk. Ensure power stability and back up data first.
6. Test Peripherals on Another System
This simple test rules out whether the problem lies in the device or the computer.
If the peripheral works fine elsewhere, your issue is software or hardware-port related.
If it fails again, it’s likely hardware failure — time to check warranty options.
7. Use Diagnostic Tools from Manufacturers
Brands often provide their own troubleshooting utilities that can perform deep diagnostics or firmware recovery.
Examples:
| Brand | Tool | Key Features |
|---|---|---|
| Logitech | G HUB → Device Settings | Recalibrate sensors, update firmware |
| Razer | Synapse Troubleshooter | Fixes macro or Chroma sync issues |
| Corsair | iCUE Diagnostics | Identifies driver or RGB conflicts |
| SteelSeries | GG Engine | Cloud backup and firmware repair |
| Microsoft | Xbox Accessories App | Controller firmware updates |
8. Use Safe Mode for Software Isolation
Booting into Safe Mode disables all non-essential drivers and startup programs.
How to enter Safe Mode:
- Press Shift + Restart → Troubleshoot → Advanced Options → Startup Settings → Restart → Press 4 (Safe Mode)
If your peripherals function properly in Safe Mode, it confirms a third-party software conflict.
9. Analyze System Latency
For competitive gamers, latency issues can be devastating.
Tools like LatencyMon or NVIDIA Reflex Analyzer help detect driver-level lag caused by audio, network, or input processes.
Use LatencyMon to:
- Identify high DPC (Deferred Procedure Call) latency drivers
- Spot spikes caused by outdated device drivers or background software
- Optimize startup apps for smoother input response
🎮 “Reducing latency by even 10 ms can give pro gamers a tangible competitive edge.” — Esports Performance Institute, 2024.
10. Factory Reset or Firmware Flash
If nothing else works, perform a factory reset or re-flash firmware using official brand tools.
This wipes corrupt configurations and restores default performance levels.
Always follow official guides — never use third-party firmware unless explicitly supported.
Advanced troubleshooting isn’t just for IT experts — with patience and the right tools, any gamer can master these steps to ensure flawless peripheral performance.
🕹️ When to Replace or Upgrade Your Gaming Peripherals
Even the best troubleshooting can’t fix everything. Sometimes, your gaming peripherals reach a point where repairs and resets just won’t cut it. Knowing when to replace or upgrade can save you time, frustration, and even improve your gameplay experience.
1. Signs It’s Time to Replace a Gaming Peripheral
Here are the most common signs your device is nearing the end of its life:
| Symptom | What It Means |
|---|---|
| 🖱️ Intermittent disconnects | Possible USB port fatigue or broken cable inside the device |
| ⌨️ Sticky or unresponsive keys | Wear and tear on mechanical switches |
| 🎧 Audio crackling or low volume | Damaged speaker coil or frayed wire |
| 🎮 Input lag or drifting controller sticks | Sensor calibration failure or aging potentiometers |
| 🔌 Constant firmware issues | Incompatible with new OS updates |
| ⚠️ Driver no longer supported | Manufacturer discontinued support or software updates |
🧠 Pro Tip:
If your peripheral has been used for 3+ years with daily gaming and starts showing any of these signs, it’s often cheaper (and smarter) to upgrade rather than repair.
2. Consider Performance Upgrades, Not Just Replacements
Sometimes, an upgrade isn’t about fixing a problem — it’s about improving your gaming experience.
Modern peripherals offer huge performance boosts through lower latency, better sensors, and advanced connectivity.
Examples of Performance Upgrades:
- From membrane to mechanical keyboards: Faster response times and tactile feedback.
- From wired to wireless mice (with low latency tech): Freedom without lag.
- From stereo to surround-sound headsets: Enhanced spatial awareness in FPS games.
- From standard to adaptive controllers: Greater precision and accessibility options.
🎧 “Switching to a 1000 Hz polling rate mouse can reduce input lag by up to 90% compared to standard 125 Hz models.” — PC Gamer Hardware Review, 2025.
3. Compatibility with New Gaming Systems
As gaming evolves, peripherals need to stay compatible with new consoles, OS versions, and hardware interfaces.
Watch for these changes:
- USB-C replacing USB-A in newer PCs and consoles
- DirectInput → XInput transitions in controllers
- Bluetooth 5.3 upgrades improving wireless range and latency
- RGB sync ecosystems (like Razer Chroma or ASUS Aura) becoming platform-specific
If your old devices don’t integrate well with new systems or software — upgrading ensures smooth operation and access to future updates.
4. Economic and Environmental Considerations
Replacing doesn’t always mean discarding.
- Trade-In Programs: Many brands like Logitech, Razer, and Corsair offer trade-in discounts or recycling credits for old peripherals.
- Eco-friendly Disposal: Drop off electronics at certified e-waste recycling centers to prevent environmental harm.
- Refurbished Gear: Buying refurbished or open-box models saves money while maintaining quality.
🪴 Sustainability Insight:
Every year, gamers discard over 12 million kilograms of e-waste globally. Recycling old gear helps reduce that footprint.
5. How to Choose the Right Replacement
When upgrading, consider both performance and ergonomics to avoid long-term strain or discomfort.
✅ Checklist Before Buying:
- Test device fit and comfort (especially for mice and headsets)
- Check polling rate, DPI range, and response time
- Verify software support for your OS or console
- Read user reviews and performance benchmarks
- Compare warranty and brand reliability
💬 Quote:
“Choosing peripherals that fit your playstyle is like choosing a weapon in battle — precision and comfort win games.”
— Pro Gamer Ardis “Fenix” Malik, 2024.
6. Budgeting for an Upgrade
Gaming peripherals range from budget-friendly to elite-tier.
Here’s a quick guide:
| Type | Entry-Level | Mid-Range | Pro-Level |
|---|---|---|---|
| Gaming Mouse | $30–$60 | $70–$120 | $130+ |
| Mechanical Keyboard | $60–$100 | $120–$180 | $200+ |
| Gaming Headset | $50–$90 | $100–$180 | $200+ |
| Controller | $40–$70 | $80–$150 | $200+ |
🧾 Tip:
You don’t always need the most expensive option. Choose based on your gaming needs, not just features you’ll never use.
7. When to Seek Professional Repair
Before buying new, check if professional repair or firmware reflash can save the device.
- If it’s under warranty, contact the manufacturer first.
- If it’s a minor hardware issue (like a switch replacement), repair may be cost-effective.
- But if repairs cost more than 50% of a new unit — replacement is the better call.
8. Final Recommendation
Troubleshooting gaming peripherals can often extend their lifespan significantly — but when consistent problems return, don’t hesitate to upgrade.
Today’s gaming gear is smarter, faster, and more durable — offering noticeable improvements in both response time and comfort.
💡 Summary:
- Replace when performance drops below your needs.
- Upgrade when new tech offers a measurable advantage.
- Always balance performance, comfort, and cost.
🧩 Conclusion: Mastering the Art of Troubleshooting Gaming Peripherals
Learning how to troubleshoot gaming peripherals isn’t just about fixing problems — it’s about understanding the tools that shape your gaming experience. Whether you’re dealing with a faulty mouse sensor, lagging controller, or unresponsive keyboard, the ability to diagnose issues quickly can save you both time and money.
Throughout this guide, we’ve explored everything from common hardware and software problems to step-by-step troubleshooting techniques and even when it’s time to upgrade. You’ve learned how to:
- Identify whether the issue lies in hardware, drivers, or connectivity
- Apply systematic fixes for each device type
- Keep peripherals performing at peak efficiency through maintenance and updates
- Recognize the right moment to repair, replace, or upgrade
Key Takeaways
Here’s a quick recap of what we covered:
| Area | What You Should Remember |
|---|---|
| Diagnose first | Don’t assume your device is broken — rule out software and connection issues first. |
| Keep drivers updated | Outdated drivers cause nearly 50% of peripheral malfunctions. |
| Use reliable power and ports | Direct PC connections are more stable than hubs. |
| Reset when needed | Factory resets often resolve strange or unstable behavior. |
| Upgrade smartly | Invest in quality peripherals that match your gaming goals. |
The Importance of Consistent Maintenance
The best gamers treat their gear like athletes treat equipment.
Regular cleaning, driver updates, and firmware checks go a long way toward preventing issues before they start.
- Clean peripherals monthly to remove dust and debris.
- Back up your settings before major system updates.
- Monitor device performance — small lags can signal bigger problems ahead.
⚙️ “Preventive care is the real secret weapon of every pro gamer — not just fast reflexes.”
— TechRadar Gaming, 2025.
Final Thoughts
Troubleshooting gaming peripherals may seem technical, but once you understand the process, it becomes second nature. Each fix you perform improves your understanding of how your gaming setup works — making you not just a player, but a true tech-savvy gamer.
So next time your mouse skips, your keyboard freezes, or your controller lags — remember this guide.
Instead of frustration, you’ll have a clear roadmap to diagnose, repair, and optimize.
And if troubleshooting doesn’t solve it?
It might just be time to treat yourself to an upgrade — because smoother performance means smarter gaming. 🎮✨